Migration from Subversion (svn) to the Git distributed version control system is normally done using svn2git, which uses Ruby, preferable on a Unix machine.
In some cases, though, all you have is a Windows desktop without the privileges necessary to install fancy stuff like Ruby.
In such a case, you can use TortoiseGit for Windows to achive a svn to git migration. The beauty in this is that developers may already be used to the Tortoise tools from TortoiseSVN.
A different, much better aproach is, of course, to migrate in a Linux machine, if you can obtain a Linux box in the company or install VirtualBox locally on your desktop. In this case, a very good migration recipe is: https://www.atlassian.com/git/tutorials/migrating-overview. The basic commands are listed below.
TortoiseGit approach
Installation
First, install TortoiseGit from https://tortoisegit.org/download/.
This can be done with local Windows admin privileges, no domain admin is needed.
Clone the SVN repository into Git
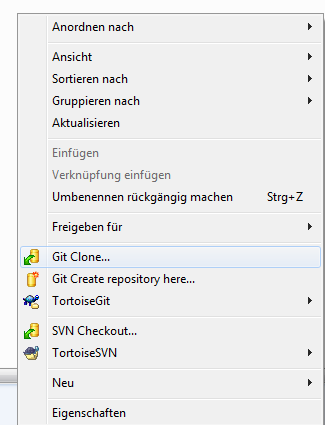
The next step is to create a local git repository on your machine and to import the svn repository into it. This can be done in one step in TortoiseGit, you don’t have to create an empty repository first. You just clone the svn repo by selecting „Git clone“ from teh Windows Explorer context menu in a fresh folder on your Windows machine.
In the „Git clone“ dialog, you can specify the SVN import parameter:
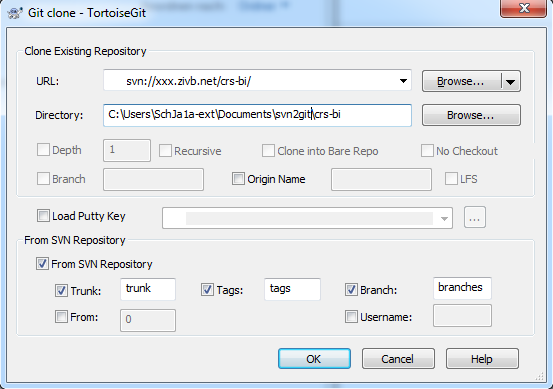
Thereafter, you have a working local git repository with the contents (including the history) of your subversion repositorty.
You may refresh (like svn update) yout git repository from svn any time by issueing „SVN fetch“ from the TortoiseGit context menu on your new git repositry.
Check the repository
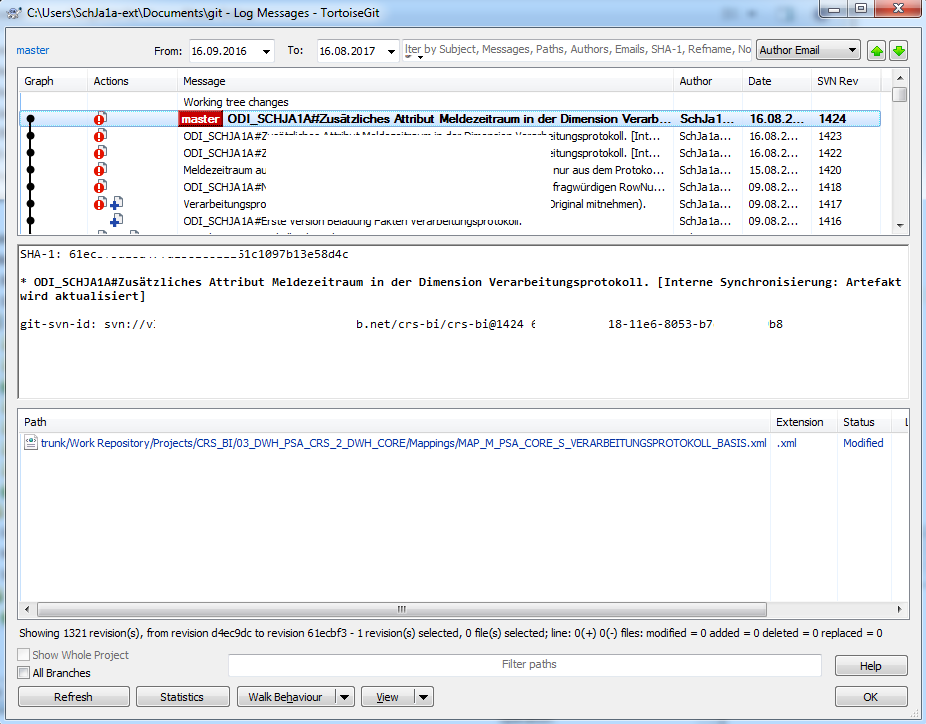
You may check the contents in your local git repository before you upload them. This can be done with the TortoiseGit „Show Log“ function:
Push your git repository
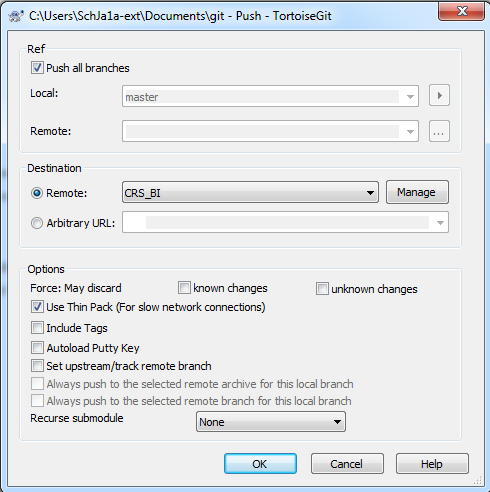
In the next step, you can push your new git repository to a remote git server.
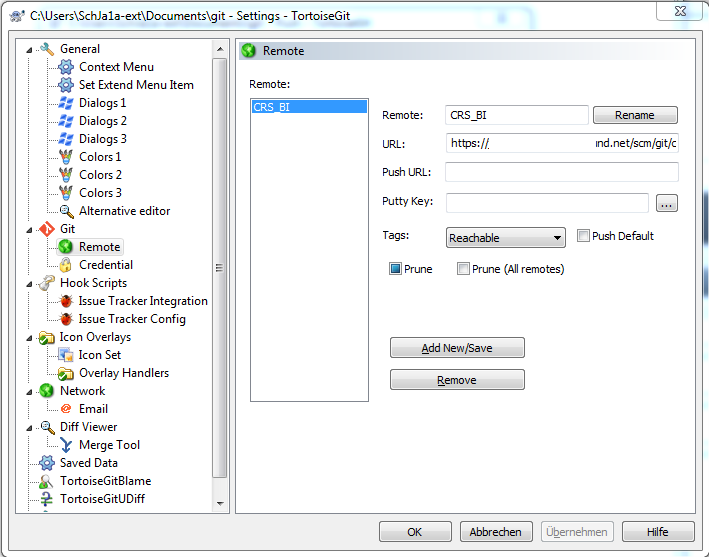
First, register your remote git repository. This can be done in the TortoiseGit conect menu „Settings“.
Afterwards, you can push the contents (upload it to the git repository server) by choosing „Push“ from the Git menu:
You should se all your content and history in the central repository now.
You cann always repeat this process: Fetch new updates from the (still current) svn server, and push the changes to the remote git repository.
Linux, git and Atlassian approach
These suggested commands assume a (German) ISO-8859-charset SVN repository to be converted.
Preparation
- Download the Atlassian migration Java class.
- Verify functionality: java -jar ~/svn-migration-scripts.jar verify
- Extract author information: cd ~/GitMigration; java -jar ~/svn-migration-scripts.jar authors <svn-repo> > authors.txt
- Edit the authors.txt file to include the correct names and email addresses
Migration
Convert your svn repository to a new git repository:
cd ~/GitMigration/
git svn clone --trunk=trunk --branches=branches --tags=tags --prefix "" --authors-file=authors.txt <svn URL> <svn repo name>
cd <repo name>
java -Dfile.encoding=iso-8859-1 -jar ~/svn-migration-scripts.jar sync-rebase
Don’t forget the –prefix option wich overcomes a bug leading to an „fatal: ambiguous argument ‚remotes/trunk‚: unknown revision or path not in the working tree“ error.
Clean the new repository:
java -Dfile.encoding=iso-8859-1 -jar ~/svn-migration-scripts.jar clean-git
Push local git repo to git server
Add a new (company) git server to your local git repo:
git remote add origin <your git server url>
To push your local repo to this server:
git push -u origin --all
Synchronization
To synchronize the still-current svn repo with your git server, you may create a cron job like this:
cd ~GitMigration/<reponame>
git svn fetch
java -Dfile.encoding=iso-8859-1 -jar ~/svn-migration-scripts.jar sync-rebase
java -Dfile.encoding=iso-8859-1 -jar ~/svn-migration-scripts.jar clean-git --force
git push -u origin --all